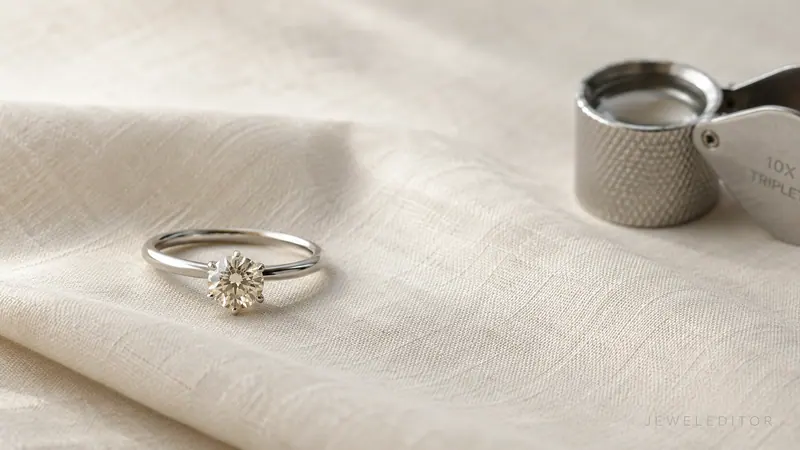
What the GIA color scale actually measures
The diamond color scale GIA uses (D through Z) measures the absence of yellow or brown tint in white diamonds. It's a backwards measurement: the higher the grade, the LESS color is present. A D-grade stone has no detectable yellow; a Z-grade stone has the most before crossing into "fancy yellow" territory, which uses a separate scale entirely.
GIA introduced the D-Z scale in 1953 to replace older alphanumeric systems that had drifted into market noise: different jewelers used different letter ranges (AAA, A, B, C) with different meanings. Starting at D was a deliberate clean break from the earlier conventions. Today the major active grading labs (GIA, IGI and GCAL) all use the same D-Z scale, though they may grade individual stones slightly differently at the boundaries. The American Gem Society helped popularize the scale historically; AGS Laboratories ceased operations in early 2023, but the scale they helped standardize is still the industry default.
How GIA actually grades color is worth understanding because it explains why the grade you see on a report doesn't always match what you see on a hand. Trained graders place the diamond table-down (pavilion facing up) on a neutral grading tray under standardized D65 illumination, a 6500K daylight-equivalent light source. They compare the stone against a set of known master stones spaced at intervals across the scale. Color grade is assigned based on the closest match.
Two important consequences of this method:
-
Color is judged from the pavilion, not face-up. Body color is most visible where light traverses the most material: the pavilion main facets and the girdle. The face-up view (how a buyer sees a ring on someone's hand) actually masks color because brilliance and table reflection overwhelm faint tint. In short, the way you'll see your ring on the hand makes color harder to detect, not easier. The grade on the report is the worst-case reading.
-
Single-grade differences only matter to graders. D vs E vs F is calibrated against master stones in controlled lighting. An untrained buyer can't reliably tell single-grade differences apart even unmounted, let alone after the stone is set in metal.
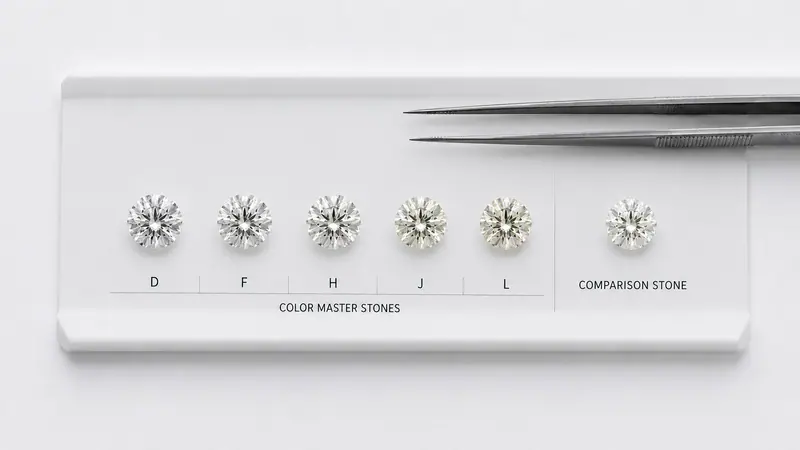
The 4Cs reference site maintained by GIA covers the consumer-facing version of the methodology in more detail.
The five visible groupings: what each looks like
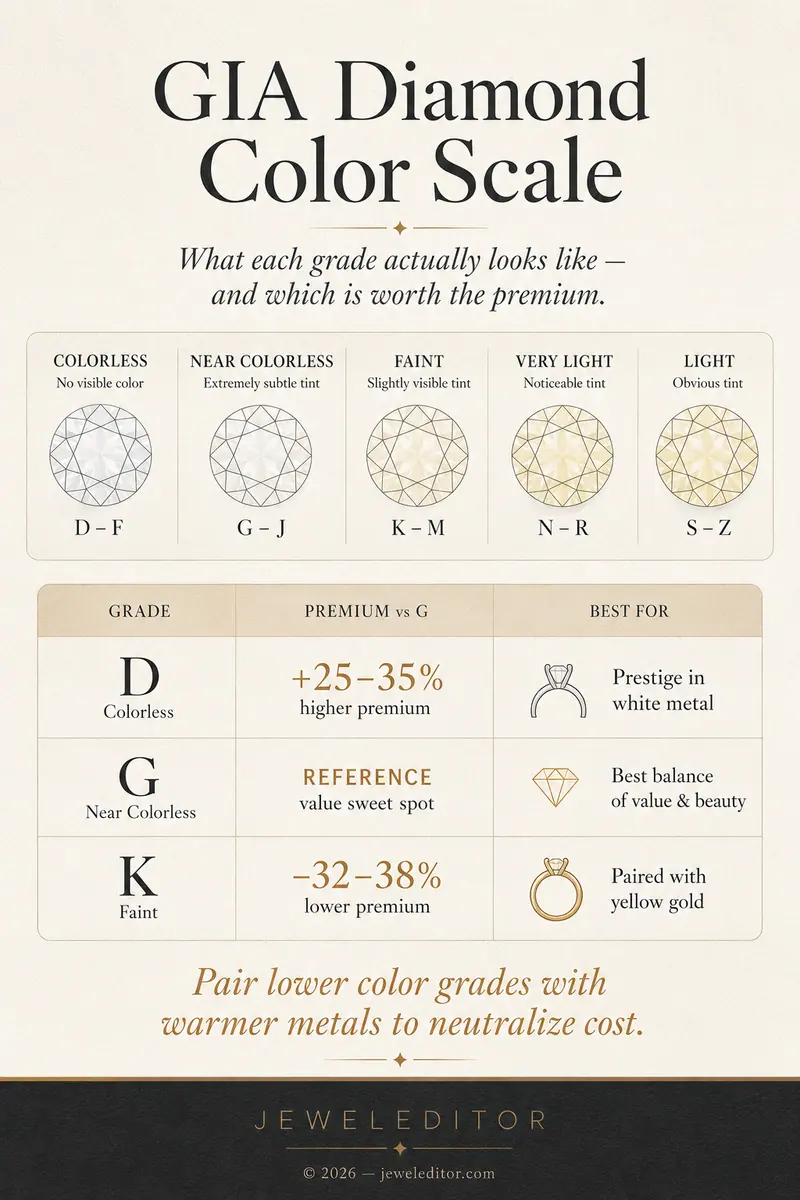
The GIA scale is technically 23 grades long, but it collapses into five visible groupings that matter to buyers, a cleaner way to think about diamond color grades than memorizing every letter:
| Group | Grades | What you'll see |
|---|---|---|
| Colorless | D-F | No detectable color in any normal viewing condition |
| Near Colorless | G-J | Faint warmth visible only against a higher master stone |
| Faint | K-M | Detectable warmth in normal lighting, especially when loose |
| Very Light | N-R | Visible yellow tint; rarely chosen for engagement rings |
| Light | S-Z | Pronounced yellow color; near-fancy territory |
To see what each grade actually looks like, and how perception shifts under different lighting and viewing backgrounds, use the visualizer below. It's the practical answer to "what does an H actually look like?":
A few patterns worth noticing as you click through:
- D through J grades all look essentially identical when viewed against a warm cream or skin-tone background. Body color only becomes visible against pure white.
- K through M warmth becomes obvious against white but disappears against a warm background. This is why jewelry catalog photography is almost always shot on cream. It flatters lower grades.
- Velvet display masks everything. Brilliance dominates against high-contrast dark backgrounds, making body color near-invisible. This is why every jewelry case in every store uses dark velvet.
- Lighting changes the diamond more than the diamond does. The same K-grade reads as faintly warm under D65 grading light, near-colorless under jewelry-store halogen and noticeably yellow under cool office fluorescent, all without changing the stone.
The takeaway: a grade label tells you what trained graders saw under controlled conditions. It is not a perfect predictor of what you'll see when wearing the ring.
How color interacts with the setting metal
Setting metal changes perceived color more than most buyers realize.
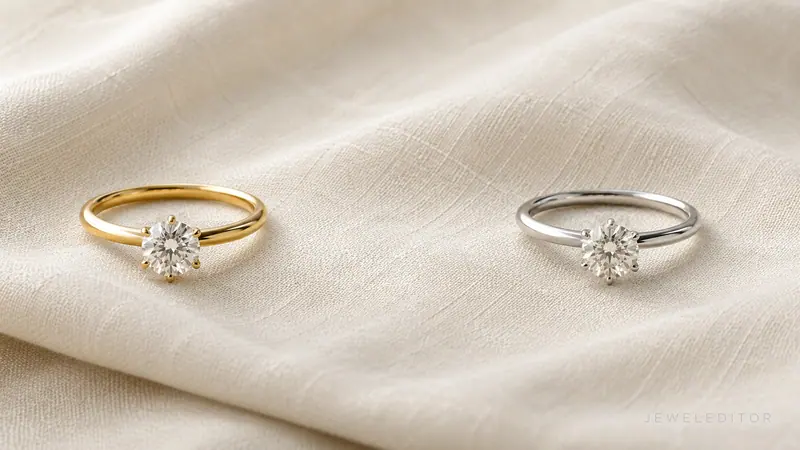
Warm metals (yellow gold, rose gold) mask body color visually. A K-grade stone in yellow gold reads close to colorless because the warmth of the metal blends with the warmth of the stone. Your eye stops seeing them as separate. (Side-by-side with a higher-grade master stone, the warmth is still detectable; in normal everyday viewing, it largely disappears.) This is not a marketing trick; it's how perception works. The same K-grade in platinum looks distinctly warm because the cool metal provides high contrast with the body color.
Cool metals (platinum, white gold) show every nuance. They make the difference between D and J visible to the careful observer because they offer no chromatic blending. Pair them with D-H grades for maximum visual purity.
Halo and bezel settings further reduce visible color. A halo of small accent diamonds frames the center stone with extra brightness, drawing the eye away from the body color. A bezel reduces side-on light exposure, which shortens the path light travels through the stone, and a shorter path means less color is revealed.
Practical rule: pair lower color grades with warmer metals to neutralize cost. A J or K in yellow gold delivers the visual appearance of a G or H in platinum at 30-40% lower stone cost. This is the single most underrated pairing in diamond buying.
How color affects price
Color is one of the four Cs (color, clarity, cut, carat) that determine diamond price, and it's a non-trivial chunk of the spread. The diamond color chart below shows the typical price impact of each grade relative to a G-color reference stone.
At the same carat / clarity / cut, the pricing typically looks something like this:
| Grade | Approximate premium / discount vs G |
|---|---|
| D | +25% to +35% |
| E | +18% to +24% |
| F | +10% to +16% |
| G | reference |
| H | −10% to −6% |
| I | −18% to −13% |
| J | −25% to −20% |
| K | −38% to −32% |
| L | −48% to −42% |
| M | −55% to −48% |
These are approximate industry-standard ranges, not exact retailer pricing. Real numbers vary 5-10% across vendors and 5-15% by carat (premiums become more pronounced at larger sizes). The ranges above are corroborated by multiple published industry references: Mike Fried's Diamonds Pro pricing guide (which puts D vs G at "save 30% with the latter"), the International Gem Society's color buying guide (confirming D→E and F→G as the two material inflection points) and the Lumera Diamonds wholesale-pricing reference (endorsing G-J as the value sweet spot). The fully sourced research artifact backing these ranges, including a Blue Nile live-listing baseline snapshot and per-grade alignment notes, lives in this repository at research/e1-pricing-multipliers.md.
A September 2026 spot check at Blue Nile shows the same shape but a narrower spread than the industry ranges suggest. Filtering natural rounds at 1.00 to 1.10 carat and VS2 clarity on 24 September 2026, entry prices ran $3,468 for D, $3,092 for G and $1,997 for J: D about 12% above G, and J about 35% below it.
On lab-grown, the color premium has collapsed entirely. Filtering 1.5-carat lab-grown rounds the same day, D-F and G-H both started at about $1,010. If you are buying lab-grown, color is now a taste decision rather than a budget one.
Two takeaways from the spread:
The colorless premium is mostly marketing. Going from F to D adds 12-19% to the stone cost while delivering zero visible difference once mounted. That premium pays for the grade label, not for what the wearer or anyone else can see in a real-world setting.
Crossing the colorless boundary (F to G) is where the real savings begin. G is essentially free of detectable color in mounted use, so the 10-15% drop from F to G is pure efficiency. Continuing to H costs you nothing visible and saves another 6-10%.
For full pricing context across the four Cs at different budgets, see our companion guide Engagement Rings Under $5,000, which breaks down how to allocate budget between color, clarity, cut and carat at the median US engagement-ring spend.
Lab-grown vs natural: does the scale change?
No. GIA grades both lab-grown and natural diamonds on the same D-Z scale.
The history is brief: GIA started grading lab-grown diamonds in 2007 using descriptive grade ranges (e.g., "near colorless" rather than specific letter grades). The decision was partly to avoid implying lab-grown stones held identical market value to naturals. In 2019, GIA shifted lab-grown reports to the standard D-Z letter grading used for natural diamonds, citing improvements in lab-grown consistency and market maturity.
Today the grading methodology is identical: same master stones, same D65 illumination, same procedural rigor. The lab-grown report layout has been tweaked over the years to make the lab-grown identifier obvious, but the grades themselves mean the same thing whether the diamond was mined or grown in a lab.
A subtle point: lab-grown diamonds aren't always D-grade. It's a common misconception that "perfect" lab production yields colorless stones by default. In reality, both HPHT and CVD lab-grown methods can produce stones across the entire D-Z range, often with subtly different undertone tendencies (HPHT can show slight blue or yellow; CVD sometimes shows brown). Modern lab-grown is graded across the full scale, just like natural.
Lab-grown grading reports look very similar to natural-diamond reports (same letter grades, same clarity scale, same cut grade), with a clear "Laboratory-Grown" identifier on the report itself and on the stone's girdle inscription. A future companion guide will walk through reading a lab-grown GIA report end-to-end.
A note on fluorescence
Fluorescence is a separate property graded independently from color, but the two interact in ways worth understanding.
About 25-35% of natural diamonds exhibit some fluorescence under ultraviolet light, most commonly blue (lab-grown diamonds also fluoresce, sometimes differently). Most of the time it has zero effect on appearance under normal lighting. But faint-to-medium blue fluorescence can mask faint yellow body color in sunlight by visually counteracting the warm tint: a J-grade with medium blue fluorescence can appear closer to G or H in daylight.
This is genuinely useful value engineering for a budget-conscious buyer: a faint-to-medium fluorescent K or L stone can deliver the visual equivalence of a G or H grade at a meaningful discount.
The exception: a small share of fluorescent stones show a "milky" or "oily" appearance, most often in the strongly-fluorescent tier rather than faint or medium. This is a real flaw and is detectable in person. Always view a fluorescent stone in daylight before buying. Never rely solely on a grading report. The International Gem Society's research on diamond fluorescence covers the perceptual interaction in depth.
How to use color in your buying decision
The honest answer to "what is diamond color, and how much should I pay for it?" comes down to matching the grade to context. Here's the practical decision framework:
Working with a tight budget? Drop to G or H. You save 15-25% compared to D-F with no visible difference once mounted.
Buying a yellow-gold or rose-gold setting? J or K is fine. The warm metal masks the body color visually. You save 25-40% compared to G-H.
Want maximum sparkle in a white-metal setting? Stay in the G-J range. D-F adds cost without adding visible quality on the wearer's hand.
Heirloom or resale matters? Stick to D-H. Premium grades retain value better proportionally, though most engagement rings never resell, so this argument applies only to a small subset of buyers who plan ahead for that scenario.
Going lab-grown? Most labs default their inventory to G-H because that's what the market wants. Paying for D-F in lab-grown is overpaying for marketing rather than scarcity (lab-grown D is not actually rare in the way natural D is). G or H lab-grown is the practical answer for the median buyer; if size matters more than spec, consider a J or K paired with warm metal. For the broader lab-vs-natural decision framework (pricing spreads, resale, ethics), pair this guide with our budget tier guide for the $5,000 sweet spot, which covers the lab-vs-natural tradeoff at that price point in detail.
Want to see what your specific situation looks like? Use the Color Grade Visualizer above: pick a grade, set the lighting and viewing background that matches how you'll actually wear the ring and compare grades side-by-side.
The honest framing: a color grade is one input among four. Spending an extra 25% on color, when that money could buy a half-carat of additional size (a difference everyone notices), is rarely the right tradeoff. Match the grade to the metal, the metal to your taste and use the savings on what people actually see.
Last audited: 2026-09-24, with a Blue Nile spot check of the color premiums that day. JewelEditor Editorial. Color grading methodology drawn from the Gemological Institute of America and its consumer-facing 4Cs reference, with cross-references to the AGS color grading standard and the IGS research library. Industry pricing context via Mike Fried's Diamonds Pro pricing guide and the International Gem Society's color buying guide, with a Blue Nile live-listing baseline snapshot.